Manage FF&E specification, procurement, and product data at scale. Fohlio helps you take on bigger projects with confidence and grow your firm. Sign up to explore these features today.
We often get asked for guidance, suggestions, and tips on the best way to create FF&E product selection catalogues.
While each firm has their own unique needs, the fundamental idea is the same across the board: You want to build a digital materials library that makes it easy for you to re-specify products, according to your current project’s requirements.
Learn more: Standardize Franchise Specification and Procurement With Ease
Using Design Guidelines for Pre-Approved Product Selections
Let’s take for example a design firm that works with branded projects, like a hotel. The hotel will have a pre-approved selection of products that fit its brand. From this catalogue, designers can specify items that embody the brand while incorporating local culture at the same time.
Setting up and adhering to these design standards also makes project rollouts more efficient.
Using Product Selection Catalogues for Pricing Packages
Another popular application of product selection catalogues is often seen in design-build firms. Many firms that specialize in single-family homes will offer different “levels” of finish and FF&E packages, according to how much the client is willing to pay.
For example, a “luxury” package will include more high-end finishes compared to a “basic” package.
Some products will also be labeled as either basic or deluxe depending on the project it’s used in. For example, a type of hardwood flooring could be considered part of the highest-tier package for Riverside Villages, but only basic for the higher-end Ocean Cove project.
How to Create Product Selection Catalogues and Project Templates
We’ll split the process of building product selection catalogues into three parts: Setting up your project templates and creating punch lists, labeling your products, and lastly, adding the products to a project.
Keep in mind that we’re going to be walking through a basic, universal setup, so feel free to make adjustments according to your firm’s needs.
Learn more: What is FF&E: The Ultimate Guide to Specification, Procurement, and More
Step 1: Setting Up Your Project Templates and Punchlists
Working off of a list of all your project types, create a new project for each. These will be your templates, so give each of them a name that easily identifies them as such — for example: “Template — Riverside Villages”.

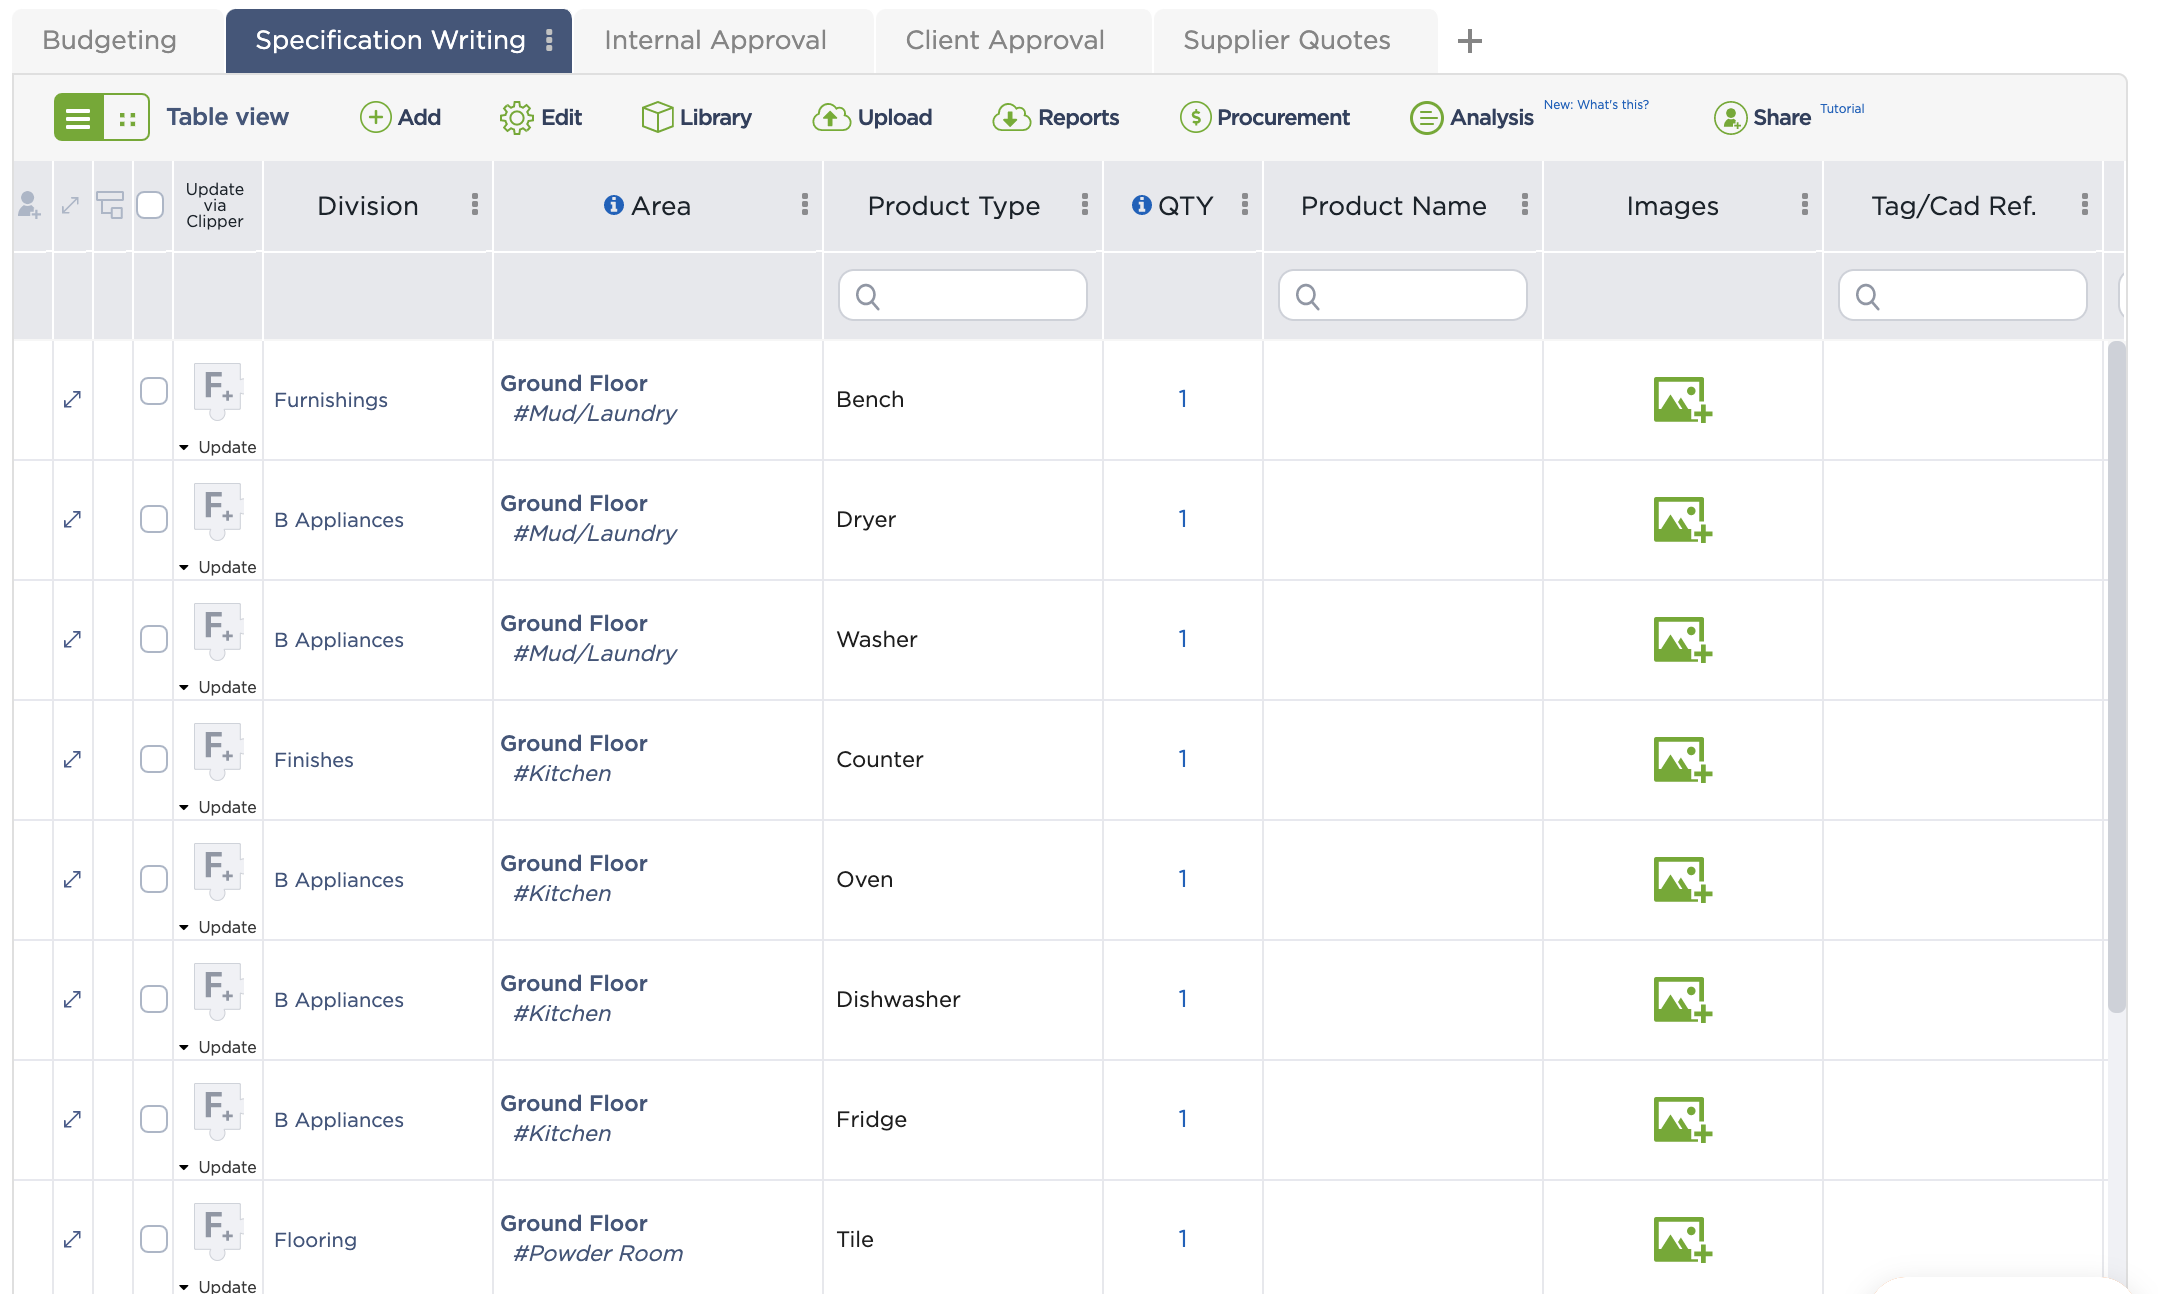
Go into each project and add a placeholder for all the items you will need, grouping them by area. If you’re building single-family homes, for example, you’ll want a folder each for the Ground Floor, Second Floor, and Basement.
The Ground Floor will need flooring, wall finishes, doors — and if you also provide FF&E, a couch, coffee table, fridge, oven, dishwasher, etc. You’ll want to divide these further into sub-areas like the living room, kitchen, laundry area, and so on.
Step 2: Labeling Your Products
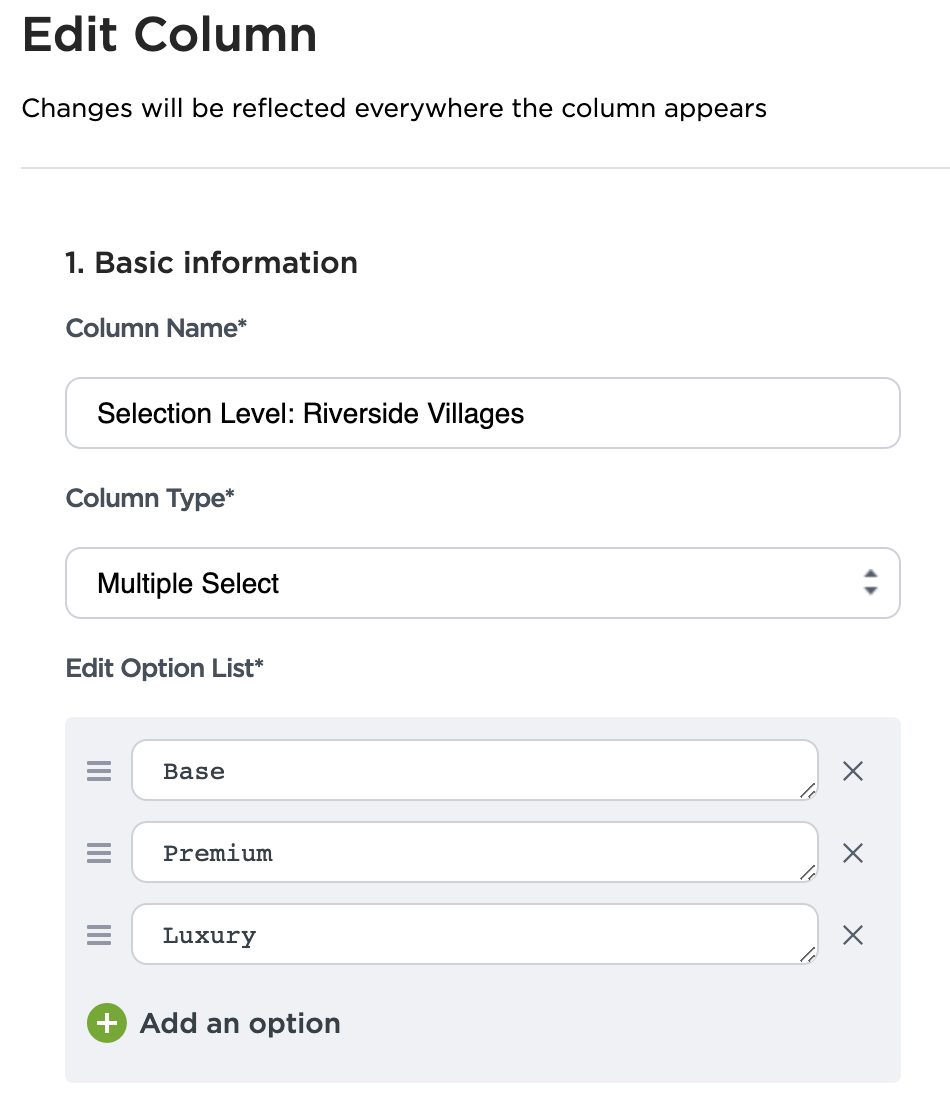
Make a list of all your product selection levels or packages for each project type. Next, create a list-format, product-specific column for each project type. You’ll want to name them something like, “Riverside Villages Level” or something similar.
Under each of these columns, add the levels or packages as list options. For example, under “Riverside Villages Level,” your options will be “Base,” “Premium,” and “Luxury” or, again, something similar.
Next, set up a project that you can use as a workspace. You can name it “Product Library” or “Design Center” or simply “Workbook.” Add all the “Level” or “Package columns to this project, then add all the products you want to label.
Now, go through each of the products in turn and select an option from the lists in each of the columns. A certain tile, for example, could be a premium option for “Ocean Cove” but a base option for “Lake Hollow.”
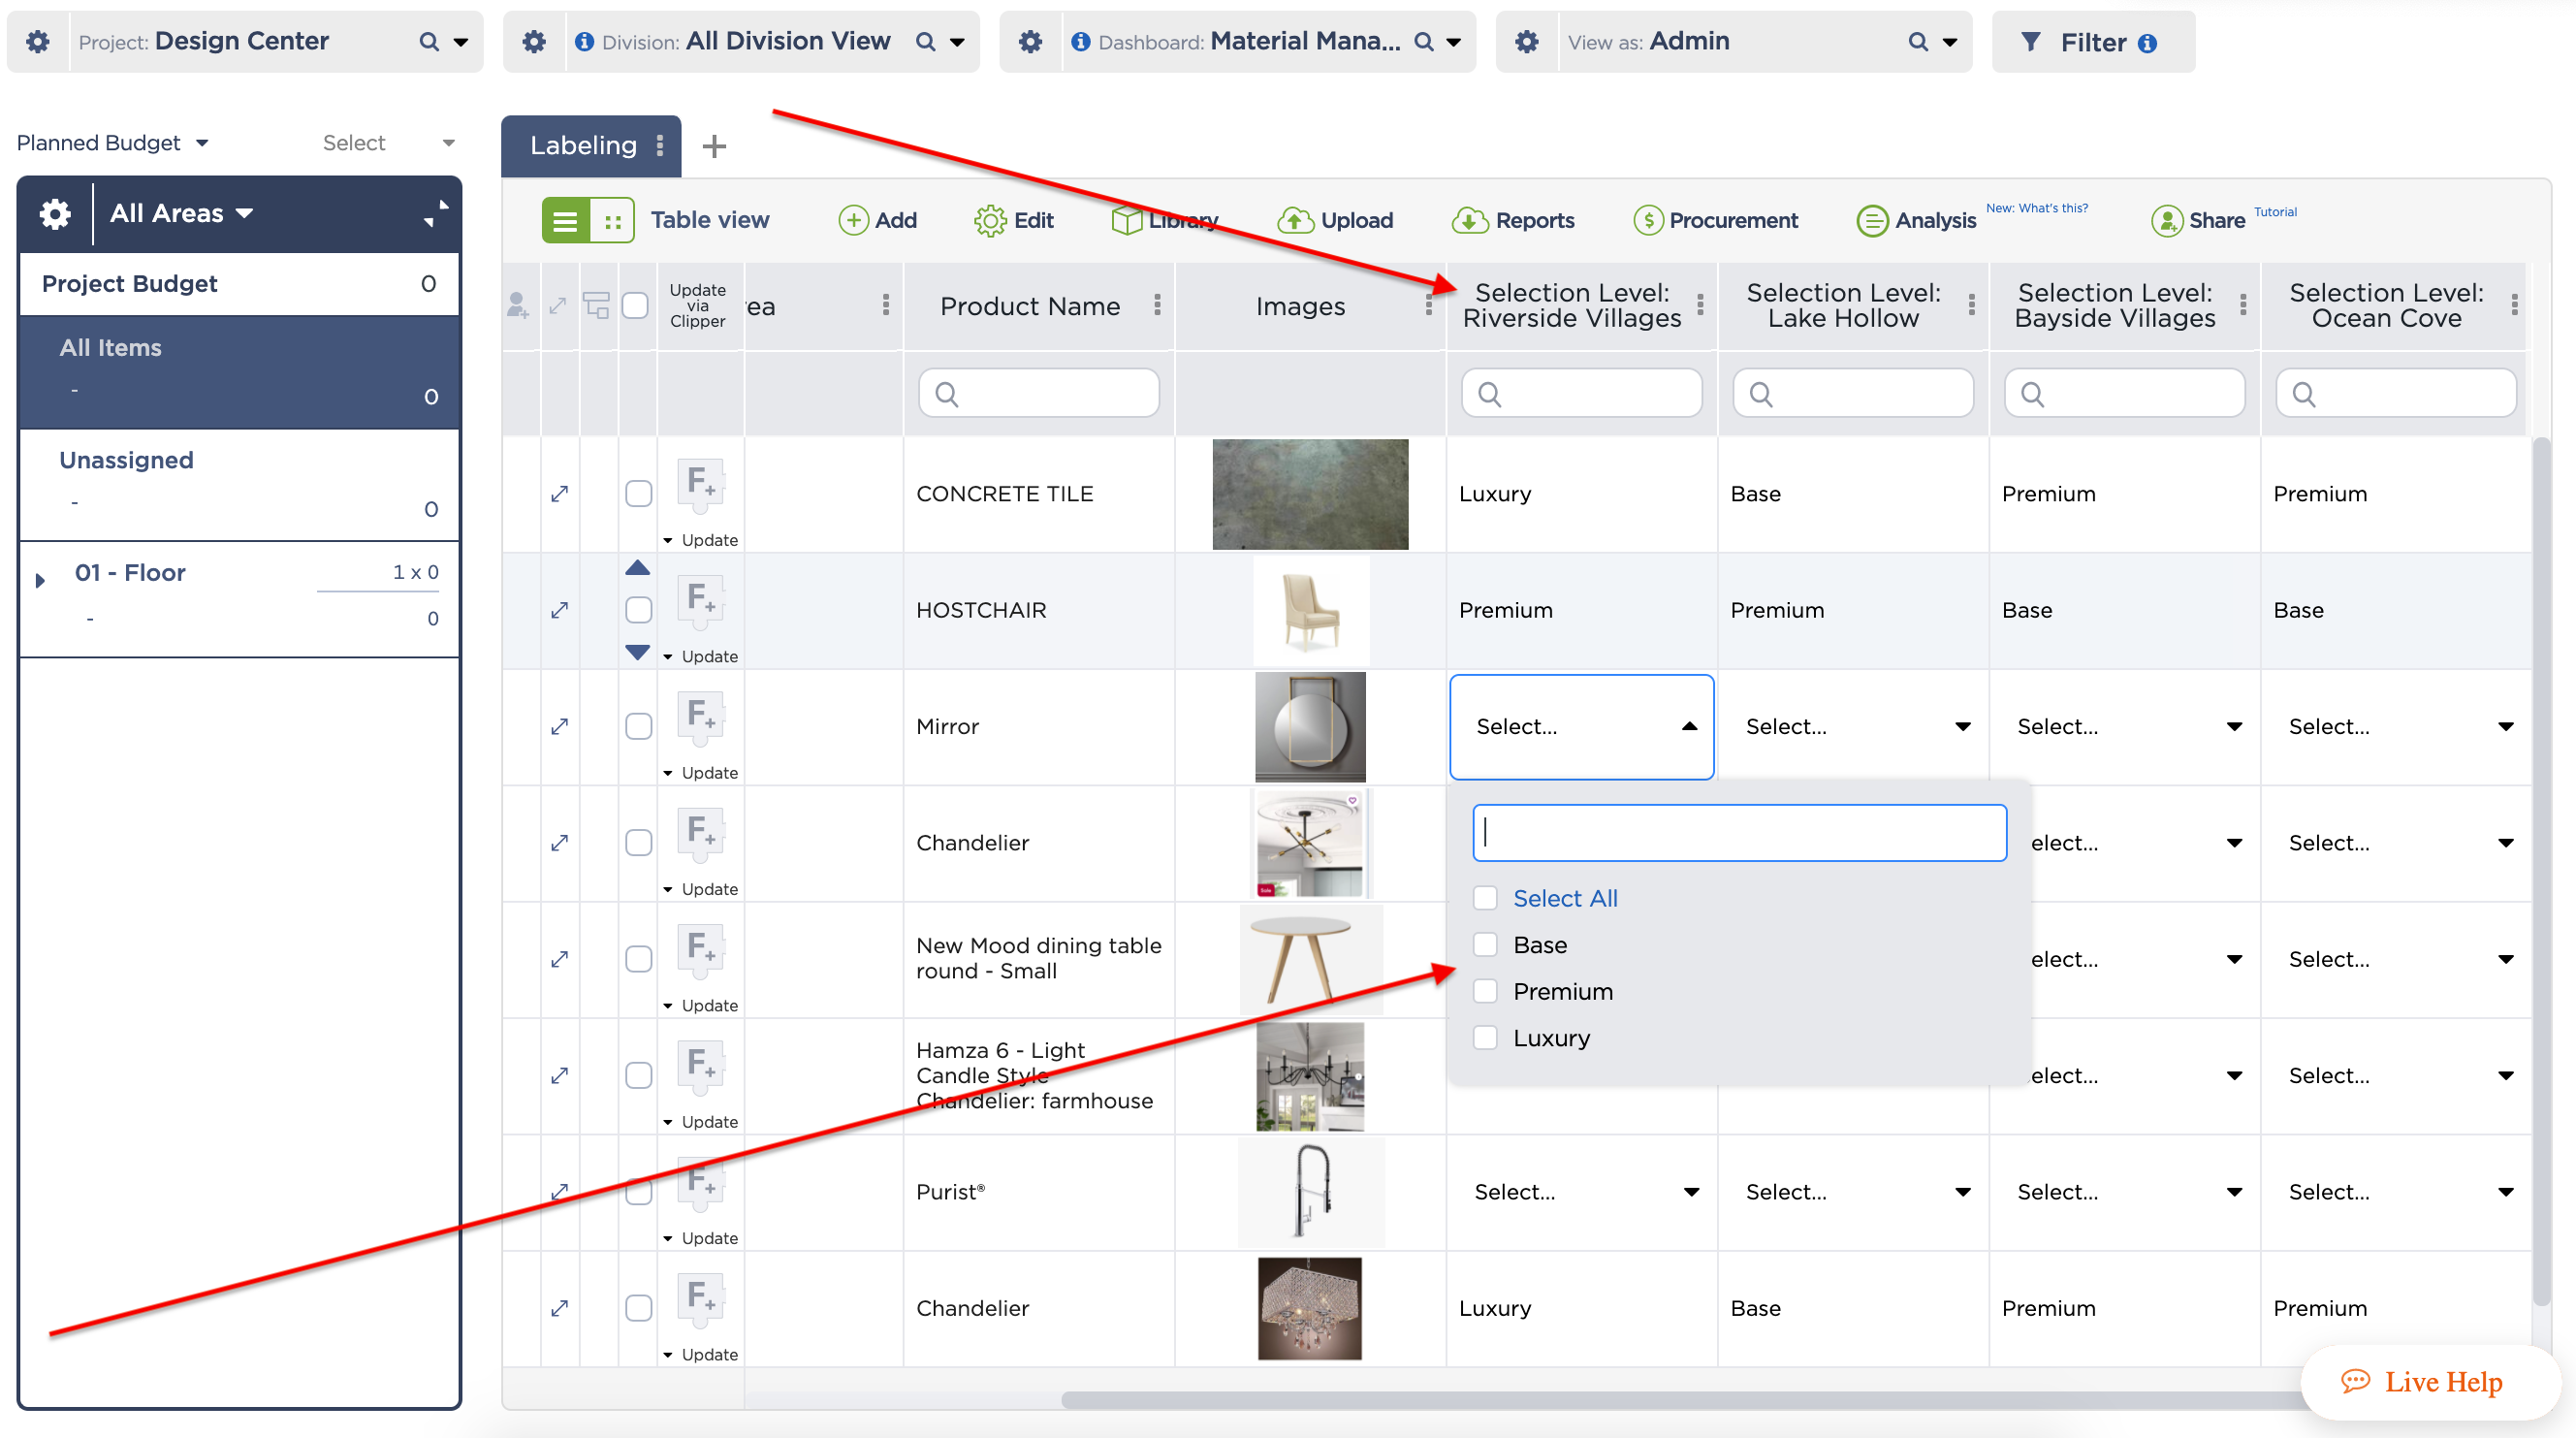
Congratulations — you’ve created your product selection catalogue!
Step 3: Using Your Labeled Products in Projects
Let’s say you have a new client who wants to have a single-family home made in Ocean Cove. Go to “Project Editor,” duplicate your Ocean Cove template, and name it after your client. “1024 Ocean Cove – Waseda” would be a good name, for example.
Go through your punchlist and specify a replacement for each of your placeholders. Click “Add from library,” select the division you want to add from, and click “Confirm.”
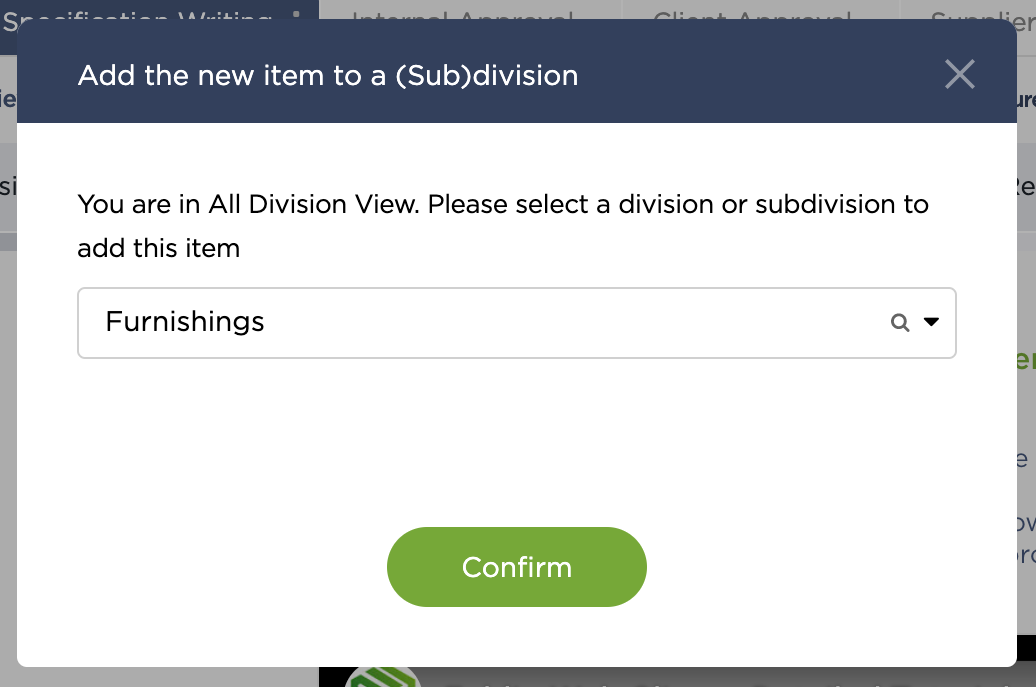
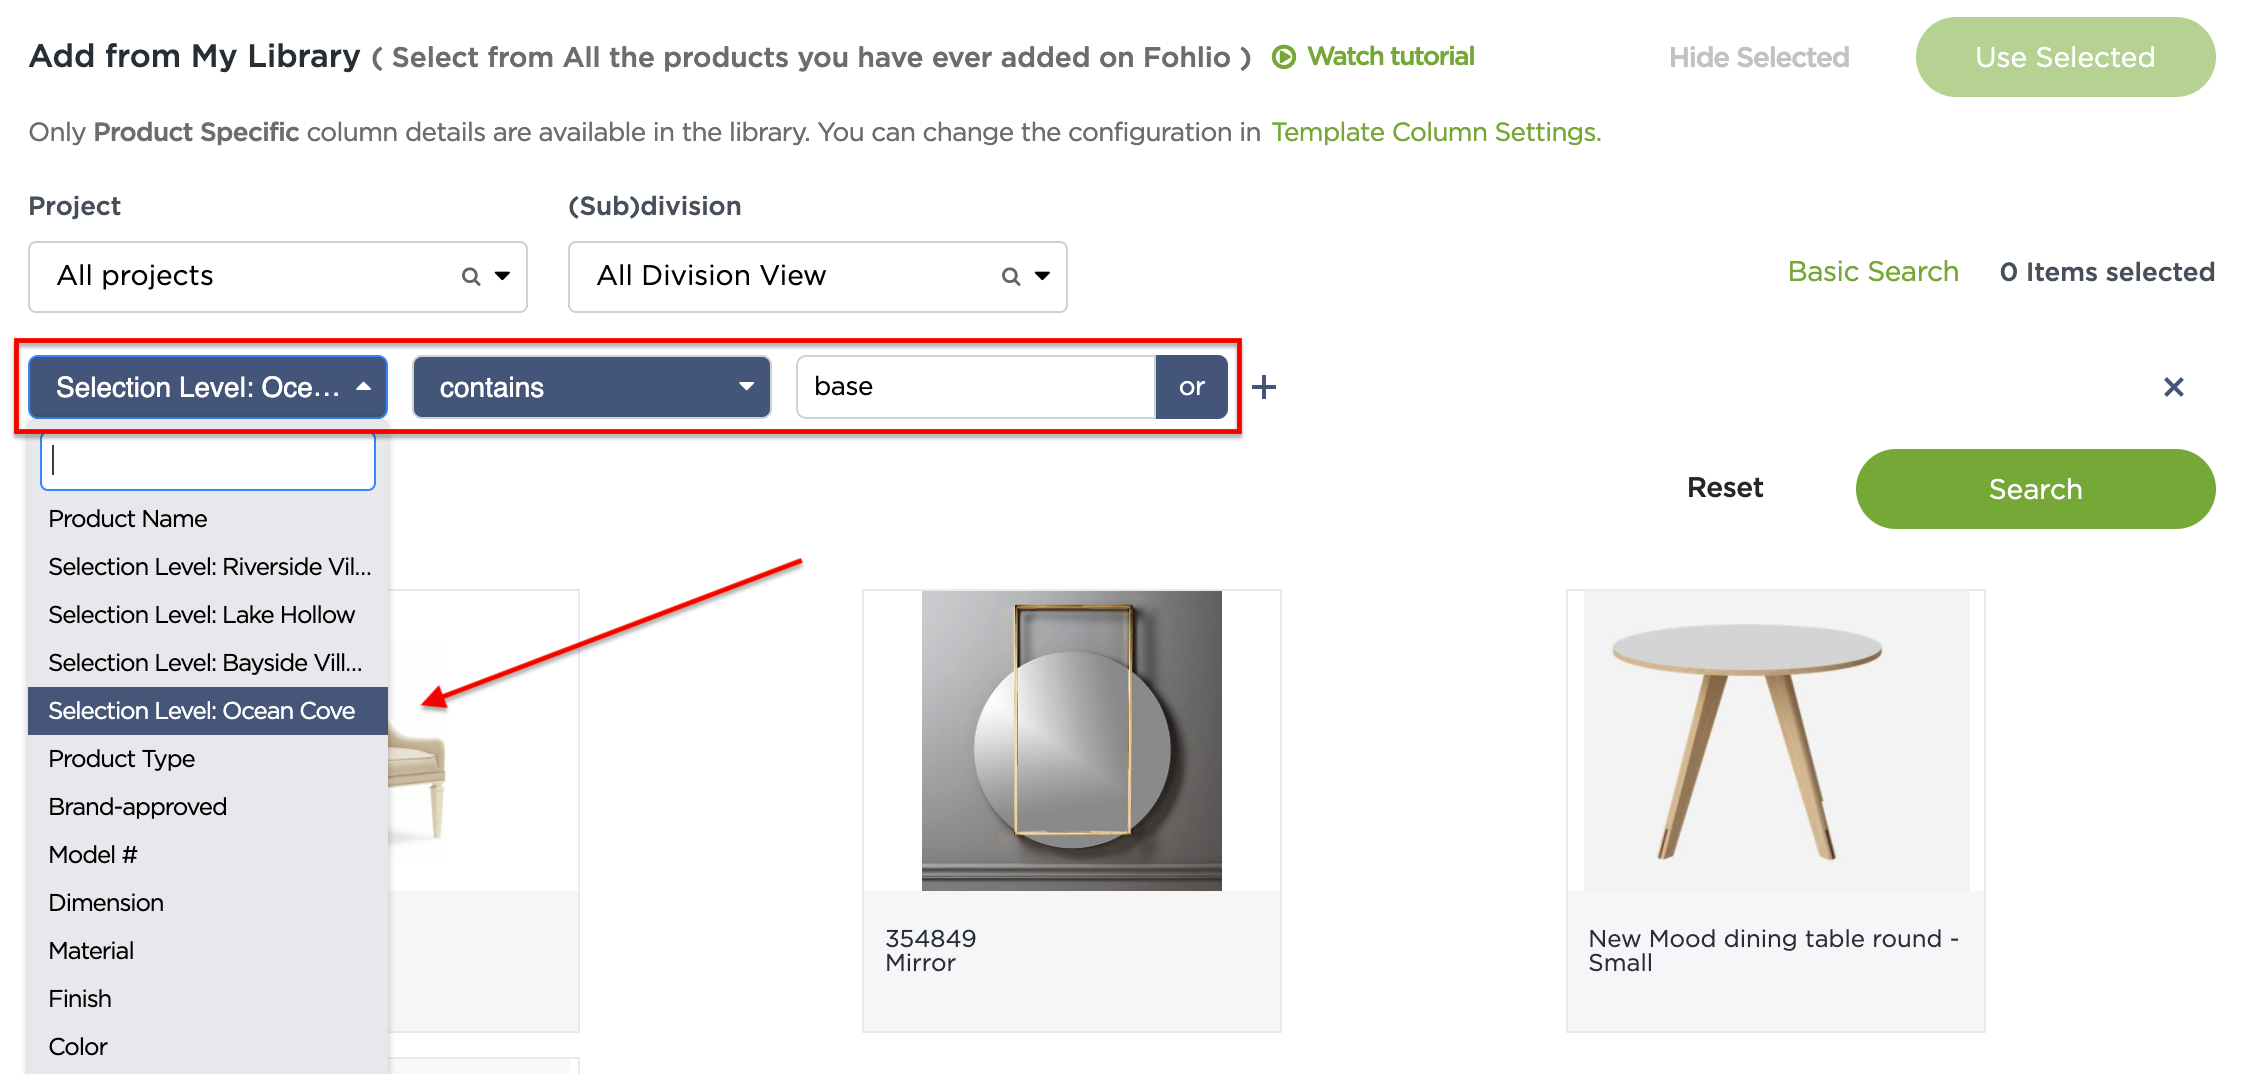
Once you’re in the library, click “Advanced Search,” and select the column you want to filter. In this case, that’s the “Ocean Cove Levels” column, because we’re adding products based on the package your client chose.
Make sure to set your condition as “contains,” then type in the level or package you’re selecting from, like “Base” for example.
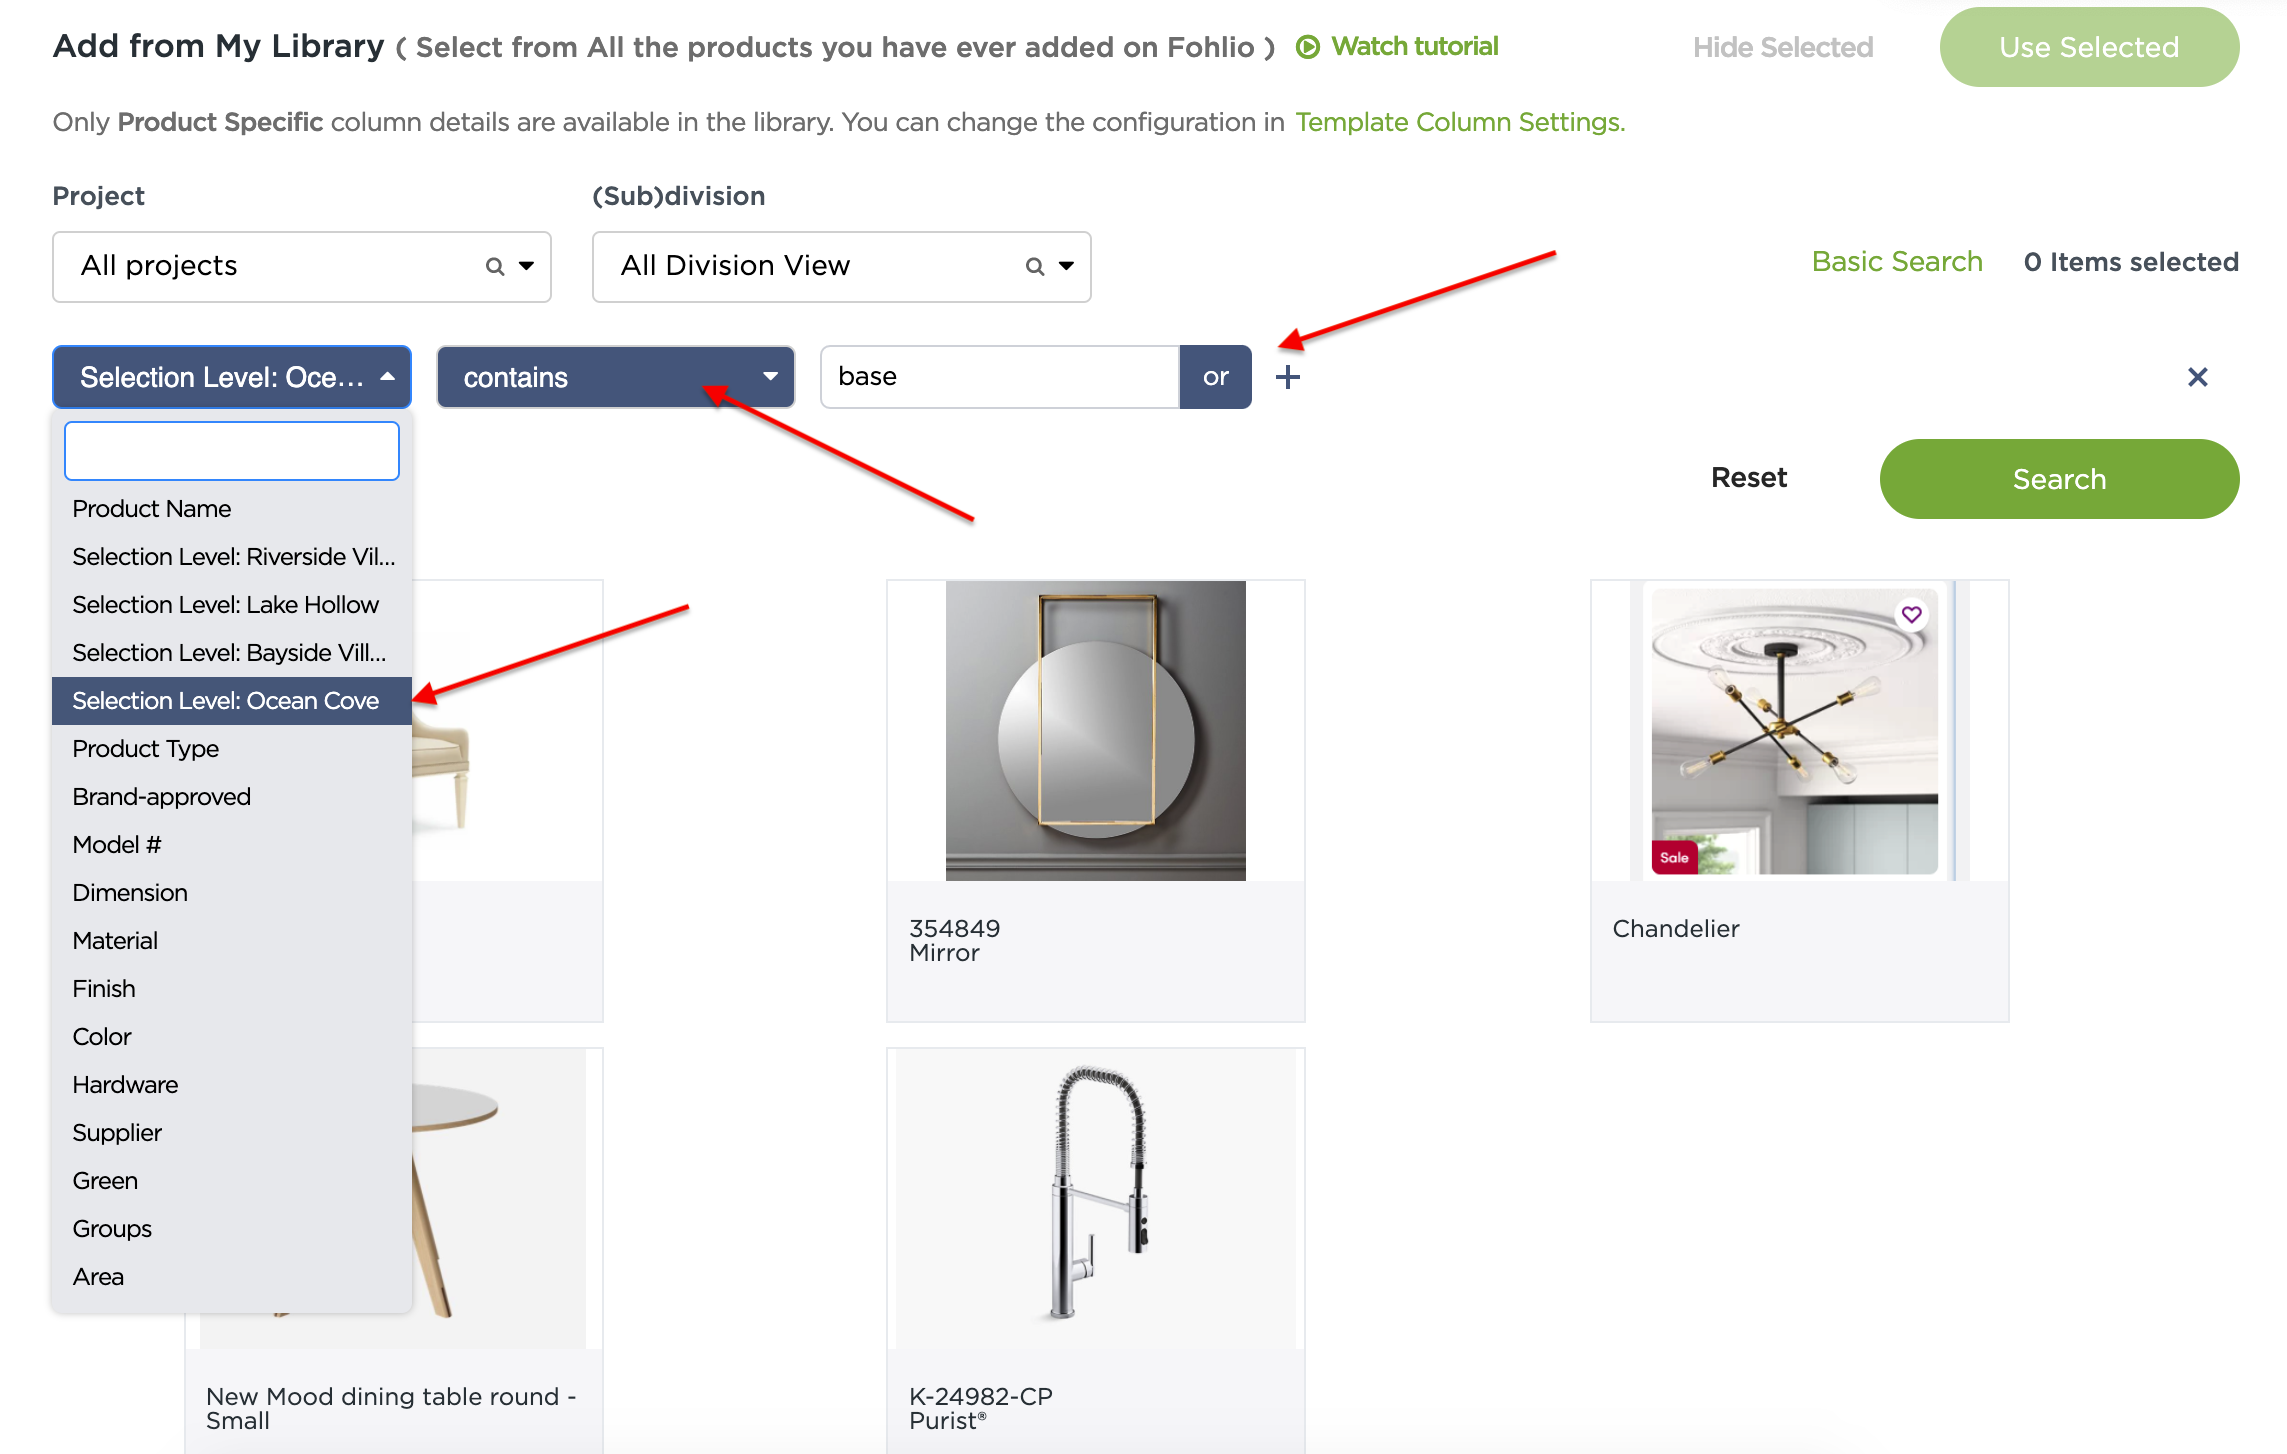
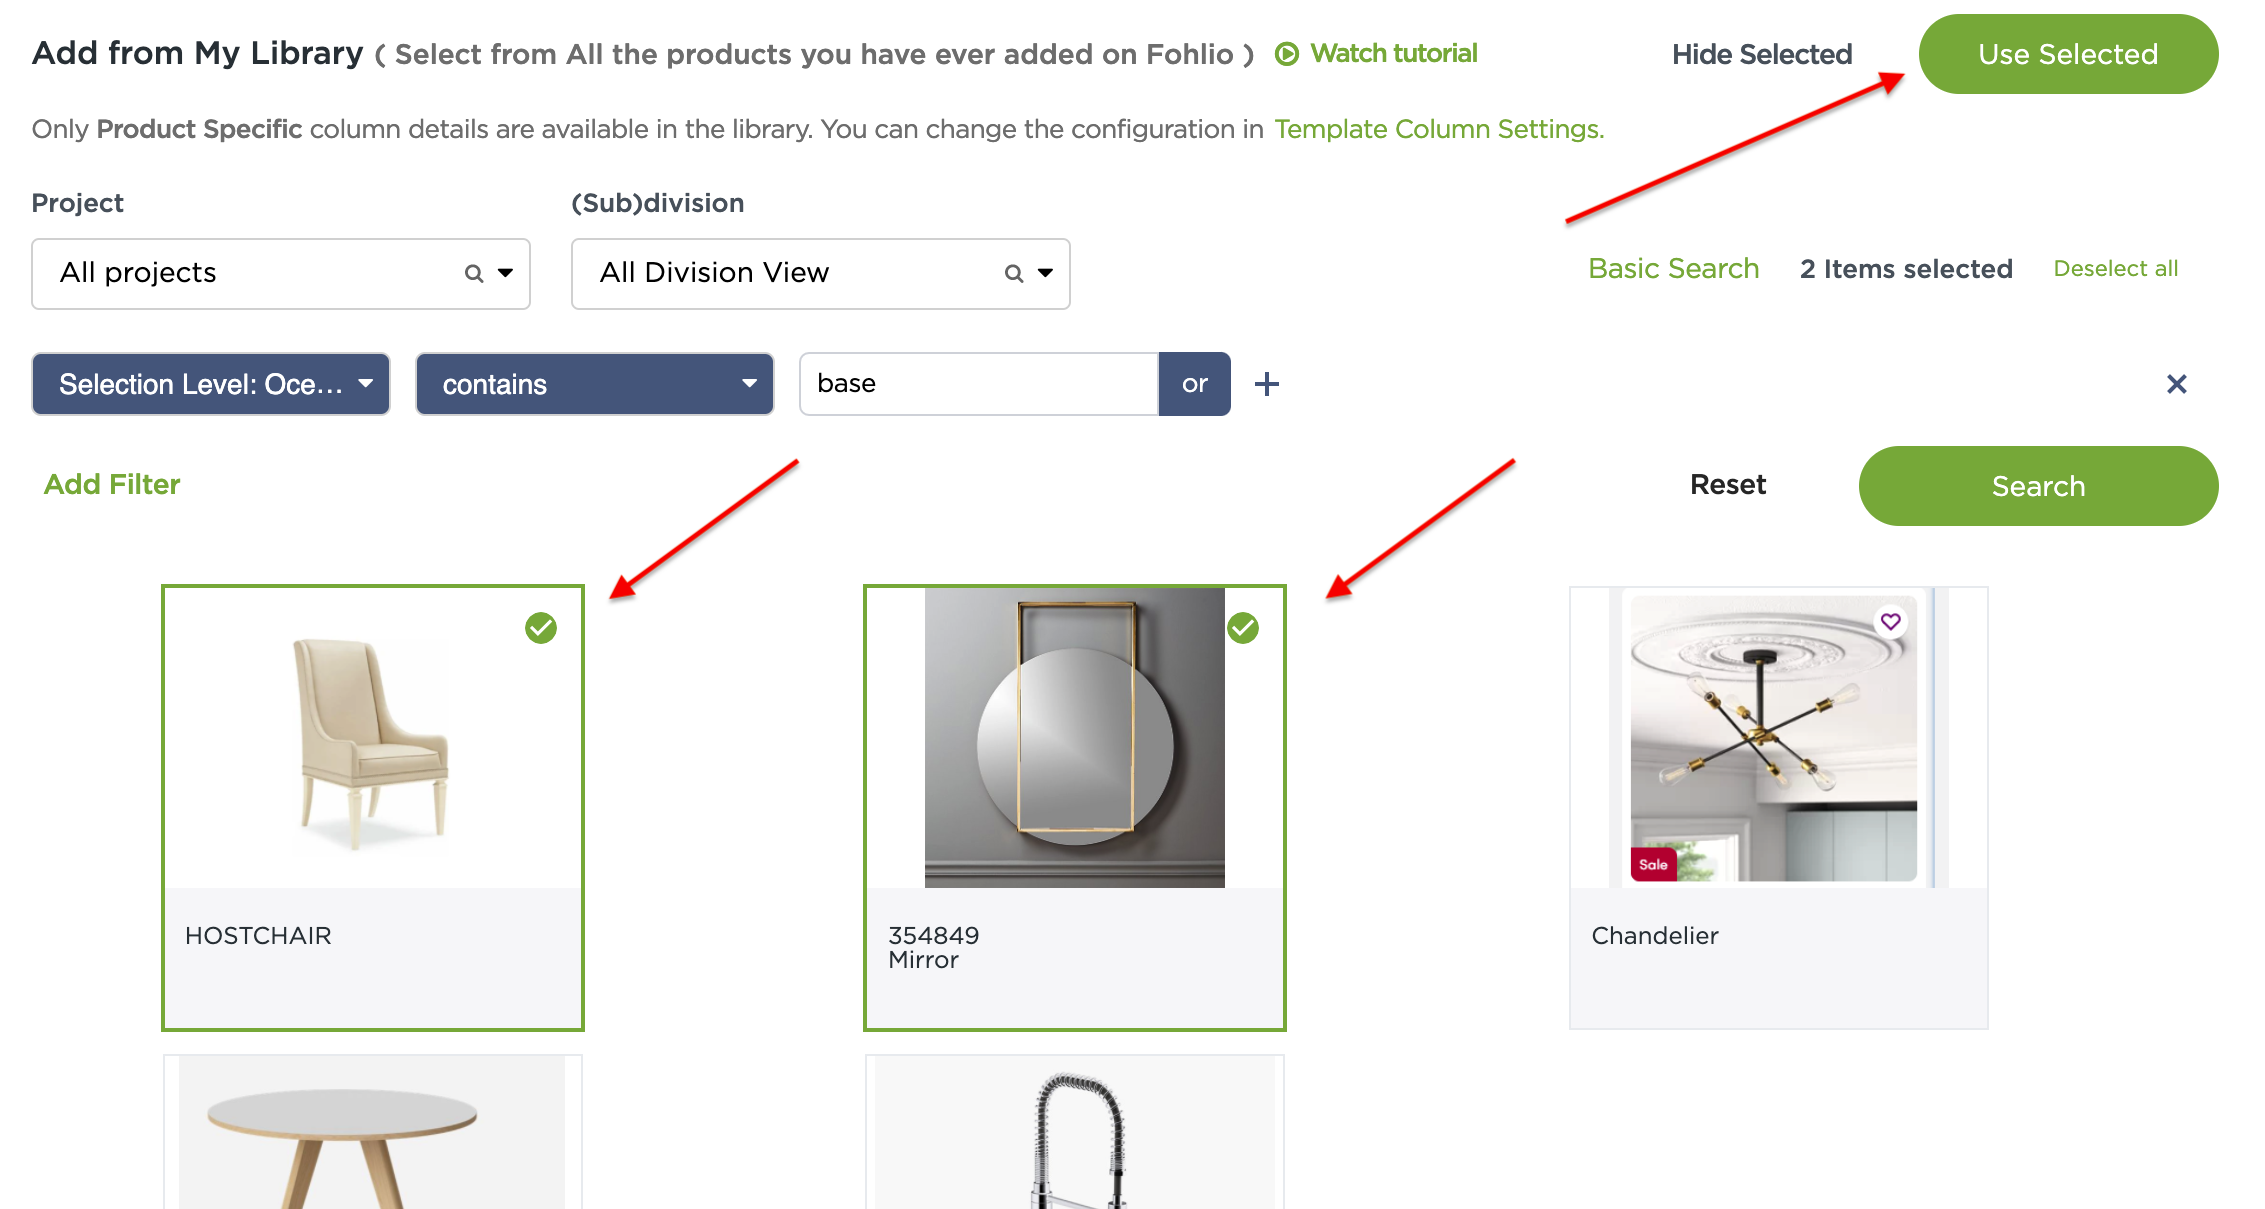
You will be shown all the products in the division and selection level or package you specific. From here, just click on the products you want to use, then click “Use Selected” to add them to your project.
Other Use Cases for Product Selection Catalogues
Before specifying products and materials, you’ll probably want to present options to your client. You can put together project-specific catalogues that you can use over and over.
Duplicate a project template and name it something like, “Ocean Cove Product Selection Catalogue.” Make copies of your existing folders and name them according to the selection levels available, like “Ground Floor Basic,” “Ground Floor Premium,” and “Ground Floor Luxury.” [image]
Fill in your folders with products that correspond to the selections they fall under, just like you did above: Replace your punchlist items with actual items from the library.
Lastly, you can either invite your client to the project or generate PDFs of selections grouped according to the different packages.
